7 Best Tiny House Wood Stoves Of All Time

Whenever the weather turns cool in cold climates, there’s nothing quite like cuddling up in front of a warm fire. What could be homier than that? After all, of course, you are doing it in a tiny house! It does, however, need the use of a tiny house wood stove.
Aside from its lovely appearance, the finest little wood burner for a tiny house provides a compact alternative for high-quality, off-grid warmth.
However, there is a concern about safety. In compact dwellings, proper clearances, pipe installation, and continuing maintenance are especially more important. Quality goods and excellent customer service may make a big difference in this situation.
There’s good news! More tiny wood stoves are available than it has ever been.
The only sort of stove you’ll require in your little abode is a wood-burning burner. A small house wood stove is a wonderful alternative for you because you don’t require quite so much warmth in a tiny area as you would in a larger home.
How Do You Pick the Right Small Wood Burning Stove?
Keep in consideration the size of your home when picking a tiny house wood burning stove so you can obtain something that will heat it properly. Make sure it’s a good weight as well. The finest compact stove for a tiny house is one that fits in the space and functions well. The stove must have a long burn time, be easy to clean, and be silent. The sort of wood utilized as a source of energy is critical. You’ll need a burner with a heat source, so it wouldn’t require a lot of time for it to get hot enough to appreciate.
It would be a good bonus if it could achieve temperatures of 1,200 ° F, but this isn’t essential. Due to their tiny size, little cubic tiny wood stoves are prevalent, but they’re only useful if you utilize them properly.
You need something to keep your house as warm as possible. If you live in a snowy place during the winter, you may need to store up wood. When searching for the best small wood stove in the marketplace, be sure to evaluate everything.
It is vital to consider how and where to search for a stove, either for household usage in a tiny house to boil water or even for other reasons.
How do you use a wood stove?
Tiny wood stoves generate heat output by burning wood. The warmth from the flame is radiated through the surface of the small stove’s walls. The air intake and out of the burner are controlled by the stove. The natural movement of air contributes to the room’s heating.
Fans also aid in the improved circulation of heat. A convection chamber distributes radiant and condensation energy in some small wood stoves. By admitting chilly air in and heating it first before expelling it back into the room, the chambers control airflow.
A damping control knob on the stove is the finest method to manage the air. It will eventually turn off a large portion of the air in one go while still allowing some to come in to ensure a comfortable temperature for all the house’s inhabitants.
Wood stoves are an excellent alternative to propane stoves, which burn fossil fuels and require money for each pound of gas. They provide an efficient burn and radiant heat emission to the home. These are an excellent method to save cost on solar panels while staying under building codes if you do not care for a little smoke.
The 7 best wood stoves for tiny homes.
1.Highest quality tiny home wood stove – Dwarf 3kw Lite

Product specifications
- It has a Cast Iron Door and Firebox for Durability and Heat Reservation
- Large Window is Provided for Maintenance and Enjoying the Warmth
- Top or Rear Flue Exit Is Provided With Top Cooking Surface
- Riddling Grate and Ash Pan for Easy Cleanup
- Separate Primary, Secondary and Tertiary Air-Control
- Add-on features: Tall Legs and Direct-Air
- Optional Enameled Door
- Spring Handle is available on all stoves!
- Water Tank / Boiler and Factory Heat Shields can be added
THE GOOD
- Comes in multiple sizes, which can correspond with the size of your tiny house.
- You can save 10% of 4″ Flue parts with code DWARF
- It’s possible to put this in an RV
- You get what you pay for, a high quality stove
The Bad
- There’s no heat shield! Which can really make temperature control different
- Lack of direct-air ventilation (you need to customize your own)
- No EPA Certification
- The factory coating is not food grade. Therefore, do not cook directly on the stove with steak, meat or any other type of food, cast iron pan is the best
- It’s a little more costly than other models on Amazon and other retailers
The Dwarf 3kw Lite is indeed the smallest model in the Dwarf range, and it’s ideal for warming rooms under 300 square feet, such as RVs, modified vans/buses, mobile homes, compact tiny homes, and campers. It has the same qualities as the other Dwarf stoves, but it’s smaller! This little heater is developed with strong characteristics and is appropriate for full-time usage, unlike other similarly sized micro stoves on the market.
While there are a few cons, the Dwarf model is a fantastic stove for tiny homes. While this stove is not made for conventional homes, it is unlicensed and solely available for recreational use.
The 3kW LITE is ideal for moving tiny space like RVs, tents, vans, buses, and yachts. Ultimately, it’s a high quality stove with a lot of customization.
2.Most affordable wood stove for a Tiny house, RV, Tent – Guide Gear Outdoor Wood Stove

Product specifications
- Galvanized steel with high-temperature heat-resistant black finish
- Five 15.5″l. interlocking stove pipes with a 3.375″ diameter
- Front hinged cast iron door with adjustable air vent
- The top platform can be used to keep coffee and saucepans hot
- Pipes nest and entire stove fits inside itself for easy storage and transport
- Only for outdoor use with proper ventilation
The Good
- Over 800 5 star reviews on Amazon
- Pretty quick set-up and installation, even with pipes
- Perfect for small RVs, cabins or even a hard shelter tent
- Perfect for back patios
The Bad
- There’s a little bit of smoke released out of the door
- Many reviewers are polarized, they either love this product or hate it
- Only good for smaller shelters, RVs, not meant for large cabins.
This stove is meant to be used as a camp stove outside. Ideal for usage in the backyard or on camping holidays. The wood-burning stove may be used for both heating and cooking. For burning wood, it includes a galvanized steel firebox with a heat-resistant coating. The entrance door is built of sturdy cast iron and features air vents.
Kindling wood can be burned in the mobile wood stove. It’s a fantastic camp heater for keeping you toasty in the great outdoors. This is The Best “DUAL THREAT” in outdoor wood-burning stoves, including Heat and cooking Abilities.
Verdict:
Overall, this stove is ideal for camping and other outdoor activities. On top, it keeps coffee and sauce pots boiling water and makes bacon and eggs! The legs remove, the pipes nest and the whole stove fits in on itself for convenient storage and transportation. Keeping warm in your small house is vital, and a Stove will give years of comfy, secure, and consistent heat.
3.Most versatile wood stove for a tiny home – PMNY Burning Chimney Multipurpose Camping

Product specifications
- Any camping tent with a stove pipe vent may easily be used.
- Folding drying racks allow you to cook or make meals while drying.
- A flat-top platform for keeping hot beverages, coffee, or meals warm.
- 1832°F high-temperature resistance.
- With a 22-pound compact stove that is lightweight and travels like a suitcase, it is easy to transport.
- The tent stove’s removable parts and collapsible legs make it easy to carry and store.
The Good
- Extremely easy set-up
- Easy carrying due to the tables on the side
- Light weight, easy to pick up and move around
The Bad
- It’s extremely small, doesn’t heat a large area
- There are some gaps in this product that cause smoke to scape
The PMNY WOOD STOVE is intended for the professional outdoor user who needs a lighter weight, extra room for firewood, and an extended burn period to remain warm on chilly evenings. It has four retractable legs that ensure safety from your tent’s floor while also providing a large, solid platform at the optimum height for cooking.
Verdict:
The PMNY wood burner is an outside stove that creates a warm and inviting focal point for your camp. In addition to protecting your hot, its flat top surface structure allows you to prepare a hot coffee, cook with a pan, or savor the barbeque.
4. Best Rustic Stove for Tiny home – US Stove Logwood 900-sq-ft-2020 EPA Certified

Product specifications
- On top, there’s a built-in cooking surface.
- The former model 1269E of the US Stove Company has been replaced.
- Logs up to 19″ in length are accepted.
- Mobile and modular dwellings are not permitted to utilize this product.
- While the stove is burning, the 2-piece safety handle remains cool.
- Heats up to 900 sq. ft. with 54,000 BTUs.
- The heavy-duty cast-iron structure combines traditional design with cutting-edge technology.
The Good
The Bad
Another option for smaller houses in the Logwood EPA-certified wood stove. It has a more traditional appearance than some of the other wood stoves on our list.
Its thin black appearance evokes a sense of nostalgia. It does not have a glass pane to view the flames, unlike some other stoves. It does feature a cooktop, so it may be used for both cooking and eating. As a result, it’s one of the greatest wood cookstoves for a little cabin retreat.
Because it’s vintage and wood-burning, you may anticipate it to work similarly to a fireplace. It heats up quickly and maintains your toasty home warm during the winter months.
The nicest part about the stove is that it is a good value for an elevated cooktop stove that allows you to be using your stainless steel saucepans!
5. Best low carbon stove for Tiny house – Cubic Mini Wood Stove

Product specifications
- It’s simple to set up and run!
- Only 13″ (Wide) x 15″ (High) x 12″ (Depth) in size!
- Eco-friendly
- Because of its secondary combustion system, it produces extremely little smoke!
- Safer than a cooking burner powered by diesel or gas!
- Removes the cabin’s dampness.
- If you eliminate the rail, you’ll have a cooking area that measures 6 1/2″ from the flue towards the edge of the hole and 13″ side to side.
- Without shielding, a clearance of 20″ is required in all directions.
- When employing correct mounting and insulation, clearances are decreased to 3″.
- Accepts wood up to 6 3/4″ in length.
Cubic Mini Wood Stoves are among the greatest little cub wood stoves available for your house. A low-carbon option for warming your home is a wood-burning stove. When you use locally accessible wood or pellets, the woodstove becomes almost carbon neutral. The Grizzly can generate a lot of heat, and the stovetop is ideal for warming up a small pan or kettle.
The Grizzly makes a wonderful center point for a compact house on wheels or maybe even a boat, as its dry heat may cover any room.
The Grizzly Cubic Mini has a reduced heating capacity but still produces a considerable amount of heat. The stove offers a good heater at a reasonable price. It is a winter version, so it’ll leave your home hot in the coming years, particularly because it’s compact enough to carry in a modest house or studio apartment.
You may select between brass and black for your ornately designed stove. This stove is ideal for houses and living spaces that are modest to medium in size.
6. Shepherd Stove

Product specifications
- To roast or boil water straight on the flames, lift the cover.
- On top, there’s room for a big pan or kettle.
- The glass door has an air wash solution to maintain it clean.
- Above the entrance, there is a secondary air inlet.
- Satin Black or Honey Glow Brown are the two colors available.
- It’s simple to keep clean and operate, and once lit;
- It offers enough heat for the garden office.
The Good
The Bad
The Shepherd Stove is a CE-approved 1.8 kW stove made for compact areas such as van conversions, shepherd’s cottages, and compact bell tents or tipis.
The Shepherd Stove is efficient and economical, so it will maintain your room warm with very little fuel (we suggest eco fuel that fits neatly into Shepherd’s narrow opening and burns extremely cleanly).
The Shepherd Stove has been thoroughly proven to work with our 3-inch protected flue system for use in vans, shepherd’s cottages, pods, arks, tiny houses, and outbuildings.
7. Ashley Hearth AW1120E-P

Product specifications
- It’s made for cabins and other big spaces up to 1,200 square feet in size.
- When burning cordwood, it complies with all 2020 EPA guidelines.
- Firebrick lining extends the life of the fire and improves the burning rate.
- Cleanup is a breeze with the integrated ashpan and cast iron ash stopper.
- Any space will appear magnificent with the nickel door handle and pedestal base.
- Approved for mobile homes.
- Logs up to 17″ in length are accepted.
The Ashley Hearth AW1120E-P is a traditional and dependable enhancement to any house or cabin. This wood-burning stove features airtight steel construction with a charcoal black finish, as well as a heavy-duty cast iron door with ceramic glass and other features.
For its effectiveness, this stove is highly popular in compact households. For a long-lasting burn and efficiency, the stove is coated with firebrick. This stove is one of the largest, yet it’s still small enough to fit in a little house.
It’s the ideal size for our little (1100 square foot) house and heats up rapidly. With its effective combustion process, the Ashley Hearth will quickly heat your home. This is among the most elegant designs you’ll ever see. It has a brush nickel finish and a pedestal for an attractive aesthetic.
This stove is an excellent value for the money. It comes with a huge ashtray that makes cleanup a breeze. If you’re searching for the greatest wood stove for a little dwelling, I’d suggest this one too.
Summing Up (Conclusion)
In a little abode, a modest wood stove seems just right—definitely Instagram-worthy. It’s an excellent fit for its attractiveness and high-quality heat, provided long as space permits safe installation. The amount of heat you require and the characteristics you seek are the most important factors to consider when selecting a wood stove for a tiny home.
What kind of stove did you choose? Please share your thoughts in the comments box below!
How to make the most of your small kitchen
How many times have you walked to the kitchen to get a snack, or to make a meal? The kitchen is a very important room in any house, and for small homes, renovating the kitchen can be a great way to make the most of the space you have. Small kitchens can be a challenge to work in, but with a little creativity, you can make the most of the space you have. If your kitchen is outdated or too small, there are a few things you can do to make it more functional and stylish. Here are a few ideas to help spice up your tiny kitchen.
1.Make use of vertical space
When renovating a small kitchen, it’s important to make use of all the space you have. One way to do this is by using vertical space to store dishes, pots and pans, and other kitchen items. There are a number of ways to do this. You can install shelves or cabinets that go all the way to the ceiling, or use a hanging rack to store pots and pans. You can also use hooks to hang utensils and other items on the wall. This will free up valuable cabinet space and make the most of the space you have.
2. Use light colors to make the room feel bigger
One way to make a small kitchen feel bigger is to use light colors. Light colors reflect light and make a room feel bigger and brighter. Painting the walls and cabinets in a light color will help to open up the space and make it feel more spacious.
3. Install a kitchen island for extra counter and storage space
If your kitchen is small, one way to gain extra counter and storage space is to install a kitchen island. A kitchen island provides extra counter space as well as storage space for dishes, pots and pans, and other kitchen items. Kitchen islands come in a variety of sizes and shapes, so you can find one that will fit perfectly in your kitchen. They are also available in a variety of materials, so you can find one that matches the style of your kitchen.
4. Choose smaller appliances instead of bulky ones
Bulky appliances like fridges , ovens and stoves, can take up valuable counter space and cabinet space, which is limited in a small kitchen. Small appliances are also affordable and often energy-efficient. So if you’re looking for a way to make the most of your small kitchen, consider using smaller appliances instead of bulky ones.
5. Use open shelving to store dishes and cookware
Open shelves take up less space than cabinets and make it easy to see what you have. They also add a decorative touch to the kitchen. You can find open shelving in a variety of materials, including wood, metal, and glass. So if you’re looking for a way to add some extra storage space to your kitchen, consider using open shelving.
6. Get creative with storage solutions
There are a number of ways to do this. You can use hooks to hang pots and pans on the wall, install shelves or cabinets that go all the way to the ceiling, or use a hanging rack to store pots and pans. You can also use baskets and bins to store dishes and other kitchen items. This will free up valuable cabinet space and make the most of the space you have.
Small kitchens can be a challenge to work in, but with a little creativity during your kitchen renovation process, you can make the most of the space you have. If your kitchen is outdated or too small, there are a few things you can do to make it more functional and stylish. Here are a few ideas that should help you get started. You may not be able to change the size of your kitchen, but by using these tips, you can create a space that is both beautiful and functional.

Tiny House Lighting – 7 Best Lighting Ideas
Tiny house lighting can be tricky, even to an electrician. Many of the light fixtures must be installed and hardwired on a do-it-yourself (DIY) basis due to the off grid demands of tiny houses. While some tiny houses may be built in residential areas that support ordinary alternating current (AC) electronics, most tiny homes are off the grid. This means that you will likely see direct current (DC) products or converters in tiny homes.
Whether you own a remote tiny home or a tiny home that is located in a residential area, your best bet is likely to visit a brick-and-mortar lighting store. While ordering lights online seems like the best option, sometimes it is better to get the help and opinion of a lighting professional and to visualize how the lighting fixtures will look in person. Even if you live somewhere as remote as the mountains of North Carolina, it might be worth your while to take a trip to a lighting showroom in Winston Salem, Raleigh, Charlotte, or the closest large city to you depending on just how far out there in the woods you might be!
The purpose of this article is to help you buy the most appropriate lighting fixtures to brighten up your tiny home and ensure that your living space is comfortable for you.
Continue reading if you:
- Have a tiny home that’s off-grid, and therefore are unable to tie into any modern electrical infrastructure. If you’re not off-grid and you have a tiny home in a suburb, you should be able to use modern light sources and products.
- Have a tiny space. Most tiny houses are less than 500 square feet. Small footprint means small electrical infrastructure, which means you need to be creative with the products you use. Basically, you’ll want to forego the use of pendant lights and chandeliers.
- Are looking to maximize your light. Instead of living in a cave, you’re looking for optimal ways to maximize lighting in your tiny home, or accentuate already existing colors and tones in your home.
- Have access to solar power, generators, or even your own hydroelectricity. While solar panels and generators are the most popular means to have electricity in a tiny home, I’ve heard of some tiny home owners generating their own electricity with self-constructed wind-turbines or water wheels.
- Own a tiny home that can be mobile or fixed. Either way, these suggestions should work for both.
Now that these assumptions are cleared up, here are the 7 best tiny house lighting ideas that you can use to brighten up your small home.
For indoor lighting in a tiny home:
1. Ceiling lighting

Ceiling lighting can be tricky in a tiny home due to their low ceilings and the need to conserve electricity. Fixtures like chandeliers or other types of “hanging lights” may not necessarily fit appropriately within your home. Therefore, you may want to take a look at these products:
- Wall sconces: An easy way to hard wire and a cool feature to bring accent lighting to your home. You can buy modern wall sconces or more rustic ones to match the style and feel of your home. Because wall sconces are perpendicularly wall-mounted and are not attached to the ceiling, they allow for light to radiate more horizontally across your home.

- Recessed lights, pot lights, or flush mounts: This is the most popular way to add lighting to your tiny house, especially if you have vaulted ceilings. Installing ceiling lights provide the lighting you need and give you the feeling of a more open, less tight-looking home. Usually, you’ll want to have these lights be on a dimmer because of their fairly strong brightness level.

- LED strip lighting: This is a more unique way to light your home and provides more of an ambient lighting source versus task lighting (lighting that you would use to cook, work, and accomplish tasks). The amount of light provided by this strategy is somewhat more minimal than the other two suggestions, but due to it being led lighting and less invasive than recessed lights or wall sconces, it gives more of a warm feeling. You can also try a variety of colors or styles, which will give your home more expression. It also removes the need to replace light bulbs.
 Image from Tiny Sip House
2. Maximizing daylight with windows and colors
One of the most popular ways to get more light in a tiny house is to optimize your natural light. Since tiny homes are such small spaces, there’s a variety of ways you can structure your home to take advantage of the natural sunlight:
- Skylights: One of the most popular ways to maximize your natural light is installing one or two skylights in your tiny house, which can make for easy daytime lighting. The skylights also make for an absolutely beautiful view of the starlight if you have a bedroom loft. Be warned though: During the colder months of the year, you will lose a lot of heat. Make sure you have adequate space heaters or insulation.

- A tiny house design for windows: Having the appropriate colors and windows can easily help you brighten up your day time in your tiny house. While types of lighting are important, ensuring you have the right mixture of color and window to wall ratio is just as important. While large horizontal windows (six by eight feet) may be excessive, I would advise for two to three ordinarily sized four by four sized windows. You may also want to consider colors that are bright like white, light blue, or yellow/beige.

- Skylights: One of the most popular ways to maximize your natural light is installing one or two skylights in your tiny house, which can make for easy daytime lighting. The skylights also make for an absolutely beautiful view of the starlight if you have a bedroom loft. Be warned though: During the colder months of the year, you will lose a lot of heat. Make sure you have adequate space heaters or insulation.
As a word of caution, as you increase windows, skylights, and natural lighting apparatuses, there will be a trade-off with insulation and heating. This is why it’s important to have a mixture of natural lighting and artificial light. You’ll also likely need night lights, so look to augment your natural lighting strategy with some of the other ideas in this article.
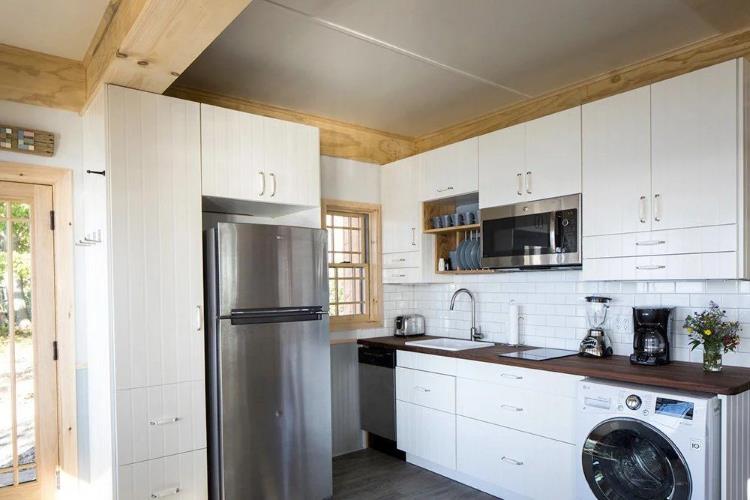
3. Kitchen lighting
The best lights for home kitchens are the ones that illuminate the whole kitchen, allow you to perform tasks conveniently, and make the space spacious. Accent and task lighting that doesn’t occupy much space are ideal for this purpose.
Place It After – is just logical.
- Internal cabinet lighting: Using LED strip lights, or even halogen bar lighting, you can build lighting directly into cabinets. While you may not have the most optimal lighting experience, your cabinets should give enough illumination to function in your kitchen at any time of the day.

- Wall sconces or down lighting: As mentioned previously, you can never go wrong with wall sconces, especially in the kitchen. All you need is one or two of them to brighten up your tiny space. Down lights can be recessed or angled similarly to wall sconces to provide not too much protrusion, but a similar amount of illumination.

- Valance lighting: Personally my favorite, especially if you have a tiny kitchen. You can use valance lighting to provide accent lighting, capture the mode of colors in the kitchen, and still provide a reasonable amount of light for tasks. In the picture below, I personally used LED bar lighting for my cabinet lights, but LED strip lights or even recessed pot lights can work as well (but you’ll need custom cabinets for the latter).

For kitchen lighting, I’d advise to have a mixture of natural lighting, cabinet lighting, and one or two wall sconces (if you don’t have recessed lighting in your ceilings). You want your tiny home to be functional due to it being such a small space.
You will also want to focus on lighting your countertops, near your fridge (most fridges are propane, so there’s no backlight) and around your sink to maximize lighting in your tiny home kitchen.
4. Subtle and unique lighting
There are a variety of subtle yet unique ways you can add lighting to your tiny home. Each of these serve a more functional mobility purpose, not so much the illumination of the entirety of your home interior. Here are some funky but cool ways to light up your tiny home interior:
- Stairwell lighting: If you have stairs in your tiny home, you can consider adding stairwell lighting. I’ve seen LED strip lights built into the back baluster of each stair tread. This makes the stairwell more like a landing pad (but is also extremely useful if you have a loft or second floor in your tiny home).
 Sourced from https://tiny-estates.com/
 - Wall corner lamps: Definitely a more funky way to add light and very similar to a floor lamp, wall corner lamps follow the contour of a wall’s corner. You can buy them to just stand in the corner, or have them installed similar to strip lighting.

- Pendant lighting or chandelier: While I’ve advised against this, if you have the room (usually vaulted ceilings with a loft bed), then you may be able to fit lights like this.

Outdoor lighting for a tiny home
Lighting for tiny houses needs to be different than that indoors. Most of your lights should be on a motion sensor and timer (to preserve electricity). Because living off-grid in a tiny house can feel isolating at night, outdoor lights can give you some peace of mind and security (not just a nice-to-have). Personally, I loved having property lights when I was growing up in the city.
5. Uplights:
A great way to spice up your property with some color and also draw light at night around key features like landscaping or doorways. Whether they’re wired or wireless, uplights can provide a degree of color and ambiance that most normal lighting strategies cannot. However, I would advise renting uplights first, trying them out on your property, and then purchasing if they end up working out for you. Making sure they are compatible with your electrical capacity and make sense in your location is really important.

Sourced from https://newstorycharity.org/3d-community/
6. Flood lights:
Sometimes confused with uplights, flood lights are an easy way to cast a massive array of light on a large surface area. You can install one or two flood lights to illuminate the entirety of your tiny home. You should realistically install these in your home to illuminate a walkway or your parking area, and have these on a motion sensor for added security.

7.Post lights:
While fully wired post lights may be out of the question, small walkway post lights may be advantageous for you to install especially if you’re in a wooded or secluded area. You can mix three or four small fence post lights with some light reflectors to create a cool illuminated nighttime walkway effect.

Your lighting strategy is crucial to living a successful tiny home life. This being said, it’s not easy due to the restrictions of electricity and space that tiny homes offer. This is why it’s important to factor tiny home lighting into your build so that you can succeed when it comes to living in a tiny house. Remember: Incorporating lighting into the design of your tiny home, both for indoor and outdoor lighting is important for both safety and comfort.
I hope this article gave you some helpful ideas for your tiny home. Let me know in the comments if you have any questions or comments about this content.
Frequently asked questions about tiny house lighting.
Can you make tiny house lighting dimmable?
You’ll need to inspect your light bulb to see whether or not it’s dimmable. Not every LED light bulb is dimmable, and it comes down to the particular components within the light bulb and your electrical system. Most fluorescent bulbs, lights, and strips cannot be dimmed because of their use of ionized gases. Therfore, I would stay away from most halogen lights. Trying to add a dimmer to a non-dimmable light can be very dangerous – always be sure to check with an electrician beforehand.
What’s the best light for a tiny house living room?
In my opinion, the best light for a tiny house living room is natural light (skylight or window) and a wall corner lamp because it fits with a tiny home owners’ minimalist mindset. While having wall sconces or pot lights is useful, it can be very energy-intensive.
How do you pre wire your tiny home with solar panels?
If you’re building your own tiny house (or designing it), be sure to check out some books like “Off Grid Solar Power Simplified.” Books like these will teach you how to use solar panels and convert that solar energy into electricity for your appliances (whether their DC or AC).

5 Benefits of Getting Professionals to Assess Your Home Roofing and Insulation
It’s already an undeniable fact that your roofing and insulation compartment is among the most relatively significant components of any home. And most consumers don’t bother checking up with them on a daily basis until there’s already visible damage or inefficiency of its function, especially with the fluctuating weather of South St. Louis.
By that point, it’s often too late. You may not know where to start when it comes to finding a professional to assess your home roofing and insulation, but doing so can have several benefits.
In this blog post, we’ll discuss five of the top benefits of optimally functioning insulation and roof, the pluses of getting professionals to assess these crucial components, and we will also go over certain factors you need to know when finding the best experts for your home. Keep reading to learn more!
How significant is roofing and insulation for tiny homes?
Your tiny home’s roofing and insulation are two of the most important components when it comes to energy efficiency. Considering that you might be a minimalist with the small scale of living, roofing and insulation work together to keep your home thermally regulated throughout all the seasons, which can save you money on your energy bills.
But if there’s a problem with either one of these components, it can cause your energy bills to skyrocket. That’s why it’s so important to get professionals to assess your home roofing and insulation on a regular basis.
The advantageous stance of a good roofing and insulation system
There are several benefits to having a good roofing and insulation system, including:
- Improved energy efficiency. A well-insulated home can save you up to 30% on your energy bills, according to the Department of Energy.
- Environmental sustainability asset. You may save a significant amount of money on your utility bills by insulating your attic. However, by reducing your usage of energy, you’re also doing your part to lessen pollution. Reduced energy use has the potential to have some significant impacts on the environment.
- Protection from the elements. A good roofing and insulation system can help protect your home from weather damage.
- Better retention of heated air. As a resident in South St. Louis where the temperature drops dramatically, keeping your home heated and cozy should be a top priority. Heaters and even fireplaces are the most common methods of keeping houses toasty. Good home roofing and insulation, however, will help homeowners save money over time by preventing heat from escaping through the roof. With a sealed roof, you’ll keep the heat in your home and your dollars in your bank account.
- Increased home value. A home with a good roofing and insulation system will be more valuable than a home without one.
- Reduced noise pollution. Having professionals to build you a well-insulated home can reduce noise pollution by up to 50%, according to research.
- Better overall protection. Insulating your roof provides an extra layer of security. You may be capable of protecting your ceiling from the damage associated with exposure to the weather by installing roof insulation, depending on the material you select. Repairing or replacing your roof may be costly, so any money you save by prolonging the lifespan of your current roof is money well-spent.
- Improved indoor air quality. A good roofing and insulation system can improve indoor air quality by reducing the amount of dust and other particles that can enter your home.
- Temperature fluctuation prevention. Roof insulation will also work to keep the excess heat from entering your home during the summer months, saving you money by keeping your house cooler. This is especially true for those areas in the country that experience much higher temperatures in the summer months.
As you can see, there are many benefits to getting professionals to assess your home roofing and insulation. If you’re not sure where to start, we recommend contacting a local contractor or home energy auditor. They’ll be able to assess your home and give you advice on what needs to be done to improve your home’s energy efficiency.
Now, let’s go right down to the juice and discuss five of the most significant upsides you can obtain in the process of getting professionals to assess your home’s condition!
#1. Workmanship and knowledge excellence
Customers in the roofing industry are well aware that superb roofing is a result of hands-on expertise. Regardless of the DIY tutorials, you watch or instructions you peruse, you’ll never be able to match the degree of expertise of a specialist. Experts in the field of roofing typically undertake extensive work and training on a number of different projects. These require a significant amount of time and effort. It is always a positive experience for the consumer, with faultless roof applications and prompt repairs.
Roofing involves more than simply putting a pitched roof sheet to the foundation. Exhaust ports, roof runoff, insulation, as well as other factors must be taken into account. You’re going to commit an error if you don’t have the proper training and expertise. Small errors may lead to leaking roofs, while big ones may necessitate the entire roof to be replaced. Isn’t it better to save both time & expense by working with a business roofing contractor who can do the job right?
#2. Abides by the appropriate local codes
It’s quite improbable that you’ve never heard of your city’s construction code. For the most part, they are guidelines for how construction companies and company owners should conduct themselves on the job site. It’s possible to make blunders while installing new roofing if you aren’t aware of the local building codes and go on and do it anyway. By selecting a professional home roofing and insulation company in St. Louis, you may prevent financial losses and the expense of repairing your facility. You may rely on them to handle your large roofing project in accordance with building requirements.
#3. Can provide reasonable warranties and insurance
When you go and place a new material and commit an error, you will be responsible for the repairs. In contrast, you might be able to get a warranty by getting professionals to assess your home in South St. Louis. If a problem arises after the provider has completed an installation or repair, the warranty states that they are responsible for it. For the most part, warranties last for a few seasons. Roofing contractors are liable for the payment of any repairs that are necessary as a result of mistakes they make or subpar work they do.
Keep clear from doing your roof work unless you’re an experienced commercial services provider with a deep understanding of the complications that might arise. If you don’t choose a professional roofing contractor, you’ll have to deal with a slew of difficulties and financial losses. It’s always a good idea to deal with a St. Louis roofing business that offers a decent warranty service whether installing new shingles or replacing an old, tattered roof membrane.
#4. Your safety is their priority
It doesn’t matter what type of home roofing and insulation you’re doing; it’s always a risky endeavor. There have been several instances of DIYers slipping from roofs while inspecting, installing, or repairing roofs. People who acquire safety gear believe that it will help them avoid accidents. A roofer’s job is dangerous, but it’s possible to make blunders that might result in bodily harm unless one is a comprehensive worker and is aware of the hazards. Let a commercial contractor with a proven track record handle your project. A roofing company in high demand will not only save you time, but will also help to keep you safe.
#5. The right pros will save you good money and time
You may save money in two different ways when you use a local roofing company. They may get goods at a bargain on your account as a customer and save recurring repairs by executing the work perfectly in the first instance. You run the danger of committing mistakes that result in a leaky ceiling or other problems if you do it yourself. It’s not uncommon to probably spend significantly much more on tiling procedures than was originally anticipated. You may prevent costly blunders by hiring a roofing professional that has been in business for several years.
Additionally, rushing to avoid terrible weather is a race against time. Imagine installing a roof in South St. Louis, or any other city at the start of the rains. Having your roof replaced may cause your belongings to become wet if the work is put off for several days due to bad weather. Also, imagine yourself doing major repairs before a house inspector arrives. As a result of the roof being completed, if you plan on selling the house, you may lose out on the deal. A roofing contractor can expedite the installation services of your roof by completing the work promptly.
Factors to consider when looking for the best roofing professionals in any city
Now that you know some of the benefits of working with a roofing contractor in Atlanta, here are some factors to consider when getting professionals to assess your home roofing and insulation:
#1. Capabilities and experience
The experience in the commercial roofing business is an excellent beginning point when searching for one. Relying on the expertise of a roofer assures that the endeavor will not be a failure. This also aims to guarantee that they don’t make any mistakes when they’re putting up roofs.
Counting the number of years they’ve been in business may not suffice. You should also have a peek at the ventures they’ve been a part of. If you’re interested in working with them, browse their profile. Using this, you can determine if the projects in question were successful and free of problems.
Knowing that the job is in the grips of someone with commercial roofing knowledge gives you peace of mind. This is only one factor to keep in mind, but there are many more.
Observe how knowledgeable they are in the field as well. It’s far easier to avoid costly mistakes when you’re dealing with an experienced and professional roofing firm.
#2. Ensure good reputation and reviews
You should also check out a roofing image of the business in addition to their years of expertise. If the organization is doing a fantastic job and providing exceptional service, this tells you a lot.
A corporation with a good reputation is essential. It assures that you’re working with a reputable roofing provider.
The internet user reviews are a good place to start. Here, you’ll find reviews from former customers. These are all the specifics of the way the roof was installed.
You can also learn about issues with the program through customer reviews. When they fail to meet expectations on a certain project, this tells you.
Make sure to ask for recommendations, too! Determine if that roofing business is the right fit for you by consulting with these folks.
#3. Opt for those with friendly costs
After you’ve jotted down the specifics of the project and come to an agreement, get a formal estimate. Comparing roofing costs is made easier by this tool. You can choose the best option for your budget.
Free estimates are offered by reputable specialists who are happy to do so. Compare their prices when you’ve gotten their estimations. It’s generally a good idea to acquire a few quotations from different local businesses.
When getting professionals to assess your property, make it certain that the contractors you choose have a solid reputation in the field of home roofing and insulation. It’s a guarantee of excellent service at a reasonable price.
Keep in mind that the cheapest price doesn’t necessarily guarantee the greatest quality. To attract clients, roofing businesses frequently offer lower prices at the expense of quality. Take into consideration the cost of the job, as well as the quality, while deciding between repair and replacement.
#4. Do they provide concrete insurance policies?
When it pertains to roofing improvements, proceed with caution. Think about hiring insured business roofers for such a task in this situation. Look at their safety protocols while you’re at it.
It might offer you an idea of their safety culture. It determines how people view the dangers of their work environment.
You and your employer may be covered under the same insurance policy. Get a copy of their insurance and warranty policies, both for workers’ compensation and for liability coverage. These are essential in the event of an accident.
Conclusion
In short, getting a professional assessment of your home roofing and insulation has its advantages. These benefits assure you that you’re working with the right team.
It also gives you a sense of security, knowing that they can get the job done right and efficiently. Furthermore, it can help save on costs in the long run.
So, if you’re planning to have work done on your insulation compartment and roof, consider getting a professional assessment first. It can save you time, money, and effort in the long run.
But remember, follow the factors in finding the right circle of pros for you and you are on your way to succeeding in your upgrading project. Good luck!
Transform your home with Mighty Dog Roofing
Getting professionals to assess such crucial structures of your property is only a must. With this, you must approach Mighty Dog Roofing in South St. Louis, the best roofing company in town. With their experienced professionals and excellent customer service, they can guarantee your home roofing and insulation will be in good hands down the road of its functioning. What are you waiting for? Get your home operating in its top shape today!